One of the prerequisites before upgrading vRO appliance is to maintain at least 3 GB of available free space. In this article I will explain how to increase vRO appliance root partition.
Note: Please take a complete backup of vRO appliance and database as well if external
Step 1:
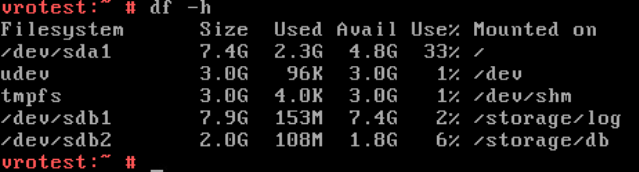
Login to vRO appliance and run df -h to check the filesystem size
Step 2:
Increase Hard Disk 1 size to the required size, in this example I have increased from 7 GB to 10 GB.
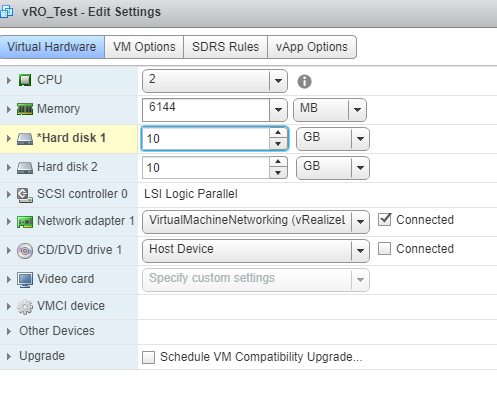
Take a snapshot at this stage, to revert back if required
Step 3:
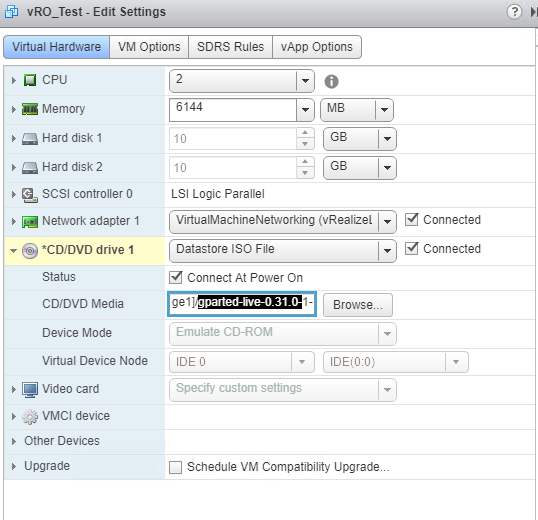
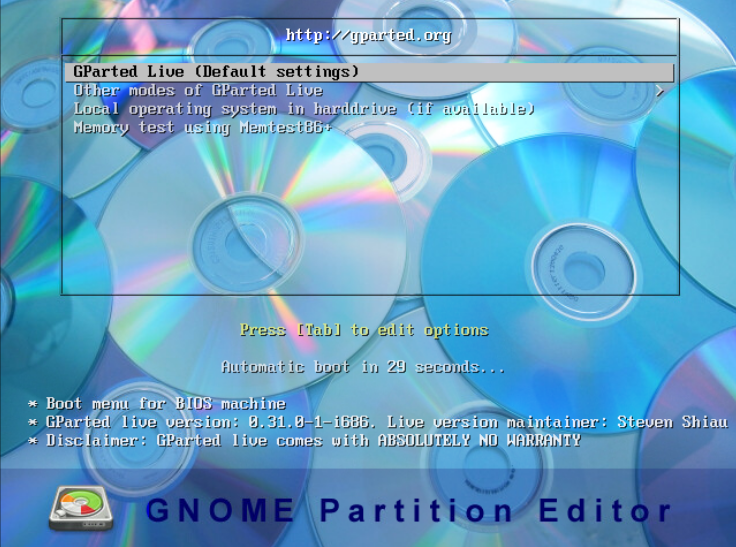
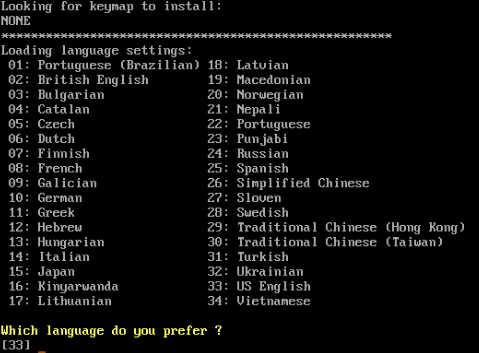
Mount the gparted live disc to vRO appliance, in this example I have used gparted-live-0.31.0-1-i686.iso
Download link: https://downloads.sourceforge.net/gparted/gparted-live-0.31.0-1-i686.iso
Step 4:
Reboot vRO appliance and press ESC key during boot to get into Boot Menu
Select CD-ROM Drive from Boot Menu
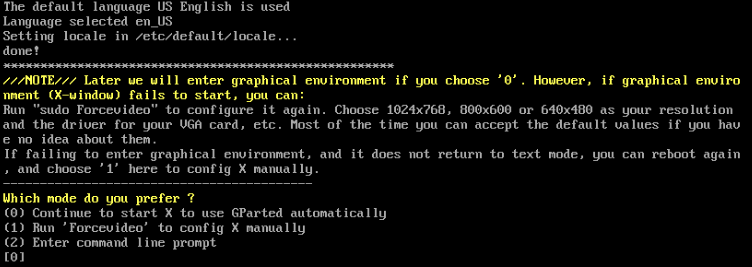
Select the default options in GParted screen:
Step 5:
You will be taken the below screen
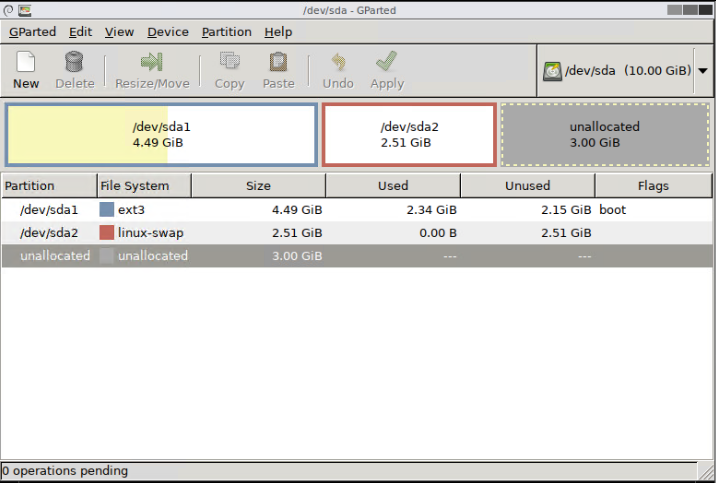
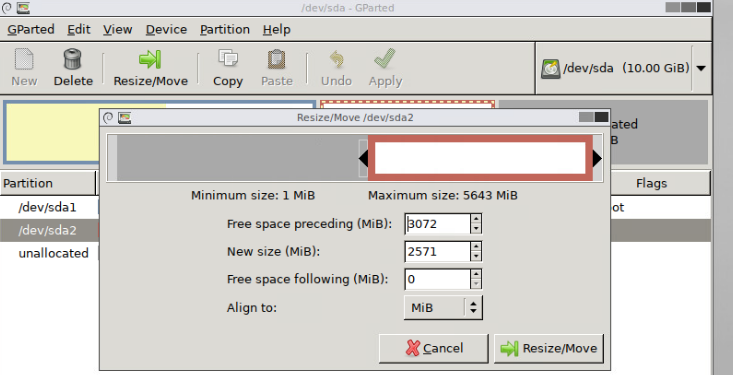
Select on /dev/sda2 and click Resize/Move option
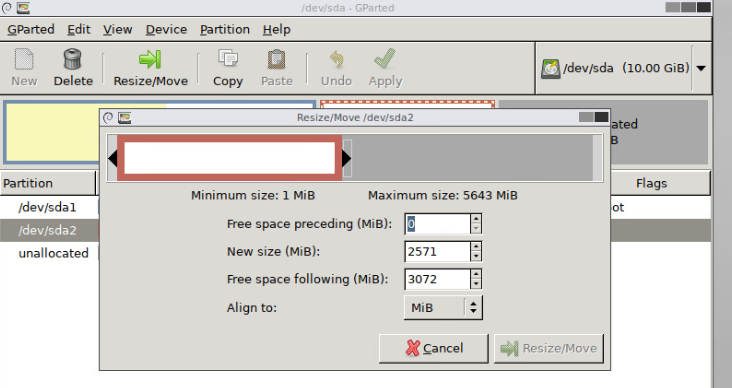
Now, move the Red highlighted partition from left to extreme right, like below image and click on Resize/Move:
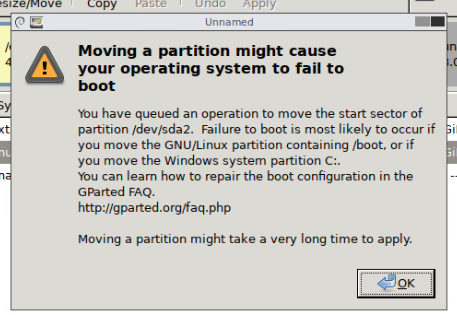
You will get a warning like below, click OK:
Step 6:
Now select /dev/sda1 and click on Resize/Move
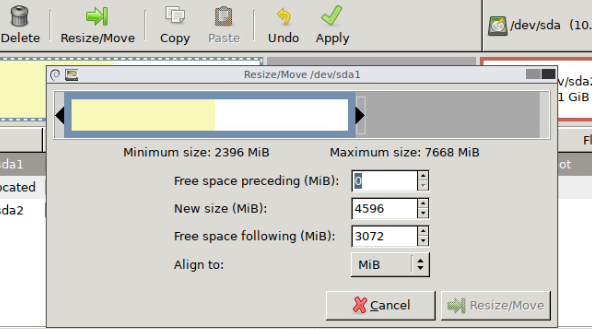
Now, select and hold the right arrow and take it to extreme right and click on Resize/Move, like below image:
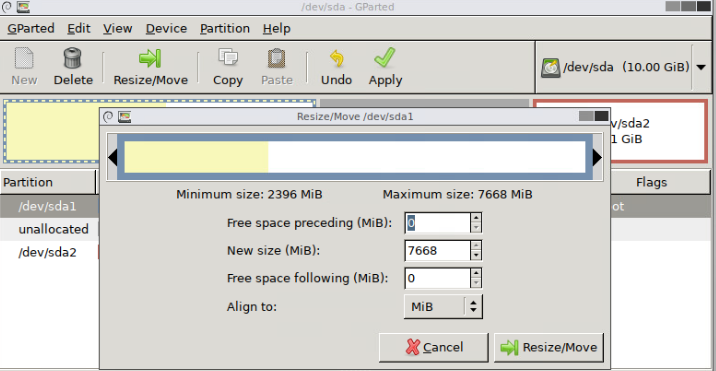
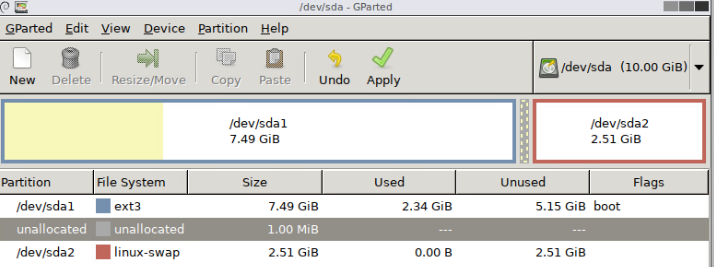
You will see 1 MB unallocated space like below image, ignore that and click on Apply option at the top.
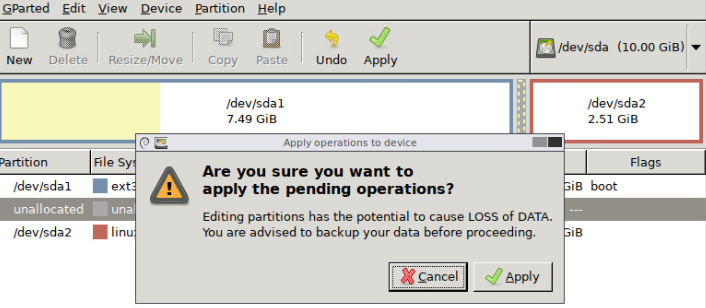
Apply again:
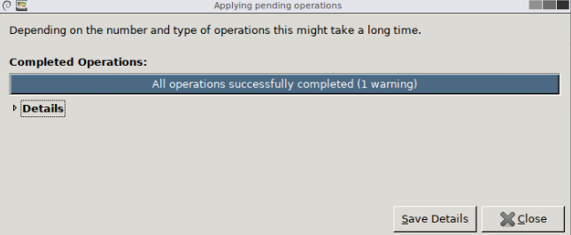
Wait for the operation to complete and click on Close and Reboot/Reset the appliance:
Step 7:
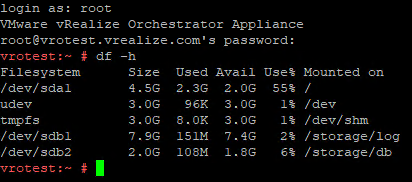
Check the filesystem size on vRO appliance: